Ever felt your PC sweating through an intense gaming session or a heavy-duty rendering task? You're not alone! We all strive for optimal PC performance, and that often means keeping temperatures in check.
While you might be meticulously monitoring your CPU and GPU temps, there's a silent hero in your system that often gets overlooked in the cooling conversation: your Power Supply Unit (PSU).
This crucial component referrers to the main heat generator, and how it dissipates that heat can significantly impact your entire system's thermal performance. So, what's the deal with your PSU fan? Should it be facing up or down? Let's dive in and get your PSU cooling right!
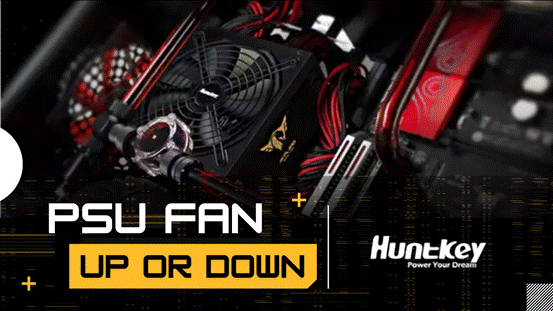
PSU Fan UP or DOWN? Which Direction Should A PSU Fan Face?
Alright, now for the question that sparks many a forum debate: should your PSU fan face up (into the case interior) or down (towards the bottom vent)? The answer isn't a one-size-fits-all, but rather depends on your PC case design and PSU mounting position.
Fan Orientation: Up or Down?
The golden rule: Always face the PSU fan toward the nearest vent. That could be down, up, or sideways—depending on your case.
- Fan Facing Down (Best for airflow): If your case has a bottom-mounted grille with dust filtration, mount the PSU with the fan facing downward. This allows it to draw in cool air directly from outside and exhaust hot air out the back, keeping PSU heat isolated from the rest of your system.
- Fan Facing Up (When no bottom vent exists): If there's no bottom intake, the fan should face upward into the case. Yes, it’ll pull in warmer internal air—but that’s still better than suffocating the PSU entirely.
- Sideways or Top-Mounted PSUs: In non-traditional layouts like dual-chamber or HTPC builds, the PSU should face the nearest case vent (usually a side panel or top grill)—never inward toward the motherboard tray.
TL;DR? Keep Your Eyes Here!
Orient the fan toward a vent.
- Bottom vent = fan down.
- No bottom vent = fan up.
- Side/top PSU? Fan toward the side or top vents.
| Case Setup | Fan Direction | Our Recommendation |
|---|---|---|
| Bottom-Mounted (with bottom vent) | ↓ Face Down (to grille) |
✅ Best Practice Pulls cool air directly from outside for maximum efficiency. |
| Bottom-Mounted (no bottom vent) | ↑ Face Up (into case) |
👍 Good Alternative The only safe option if your case has a solid bottom panel. |
| Side-Mounted (dual-chamber) | → Face Side (to vent) |
✅ Best Practice Ensures the PSU has its own airflow channel and doesn't interfere with other components. |
| Top-Mounted | ↓ Face Down (into case) |
👍 Good Alternative Allows the PSU to double as a top exhaust, helping remove hot air from the CPU area. |
Sideways & Top-Mounted PSU Tips
In sideways or dual-chamber cases (like Huntkey S980-Style setups), make sure the PSU fan is aligned with a side panel vent, not facing internal components.
For top-mounted PSUs, common in older or budget cases, apply the same logic. The fan should face outward if a top grill is present. If no vent exists, unfortunately, your PSU will need to pull in warm air from inside the case.
Replacing PSU Fans Is Not Plug-and-Play
Thinking of swapping out a noisy PSU fan? Proceed with extreme caution.
How Do I Know When to Replace a Fan?
While you can technically replace a PSU fan, it's generally not recommended for the average user due to safety concerns and warranty voiding. PSUs contain large capacitors that can hold a dangerous electrical charge even after being unplugged. Consider replacement if your setup features:
- Fan Failure: If the fan has failed, it's almost always safer and more practical to replace the entire PSU, rather than attempting a fan replacement yourself. Signs like constant loud noise/grinding, no spin under load (and no zero RMP failure), and overheating PSU leave you some clues on checking if the fan is dying.
- System Instability: If you experience random crashes, reboots, or component damage that can be traced back to power delivery issues, and you've ruled out other components, your PSU might be failing.
- Age: PSUs, like all electronic components, degrade over time. If your PSU is many years old (5-7+ years, especially if it's been under heavy load), consider upgrading, especially if you're upgrading other components.
What to Consider in Replacing Your PSU Fans
First things first, you’ll need to match the exact fan size, airflow (CFM), and static pressure rating. PSUs don’t use standard 120 mm case fans exclusively. Common fan sizes inside PSUs include 40 mm, 80 mm, 92 mm, 120 mm, and 140 mm. Each size comes with its own mounting hole spacing; therefore, make sure your replacement lines up.
Oh wait! Airflow match is key. A fan that pushes less air than the original could overheat your PSU. Too much airflow might increase noise without benefit. Also, check the static pressure to ensure it can push air through the PSU’s dense internal components.
And for wiring consideration, most PSU fans use a 2‑pin 12 V DC connector, not the typical 3- or 4-pin headers used for case fans.
Recommended Mounting & Fan Replacement Workflow
- Inspect your case
Look for bottom, side, or top vents to determine fan direction.
- Choose the correct orientation
Fan should face the nearest vent for optimal cooling.
- Match fan specs
Replacement fans must have the same size, airflow (CFM), and static pressure.
- Handle wiring safely
Never touch internal components. Only work with fan cables. Use adapters when possible.
- Test thoroughly
Boot your PC, stress test the PSU, and ensure the fan operates under load.
- Consider the risks
PSU fan replacement is risky and not beginner-friendly. When in doubt, replace the PSU instead of modifying it.
Things Might Happen in Doing Your DIY
Even with the correct orientation, your PSU fan needs a little love and attention to ensure it's doing its job effectively. Here's what you need to know about troubleshooting and maintenance:
1. PSU Fan Not Spinning (Common Scenarios)
It's natural to be concerned if you peek into your PC and see your PSU fan standing still. Before you panic, understand that a non-spinning PSU fan isn't always a sign of doom.
"Silent" or "Zero RPM" Modes: Many modern PSUs, especially higher-end models, feature a "silent" or "Zero RPM" mode. In this mode, the PSU fan will only spin up when the power supply reaches a certain temperature or load threshold. This is designed to reduce noise during light tasks (like Browse or watching videos) when the PSU isn't generating much heat.
If your PC is idle or performing light tasks, a non-spinning fan is often perfectly normal. The fan will typically kick in once you start gaming or running demanding applications.
- Low Load: Similar to silent modes, even without a dedicated "Zero RPM" feature, some fans simply won't spin at very low loads because the PSU isn't hot enough to warrant active cooling.
- Actual Malfunction: If your fan never spins, even under heavy load (e.g., after an hour of intense gaming where your GPU and CPU are hot), or if you hear grinding noises or a high-pitched whine, then it's likely a legitimate issue. This could be due to dust buildup, a faulty fan motor, or a problem with the PSU's internal thermal sensor.
What to Do:
- Monitor Temperatures: Use software like HWMonitor or AIDA64 to monitor your PSU's internal temperature (if your PSU supports this feature, not all do).
- Stress Test: Run a demanding game or a CPU/GPU stress test for 15-30 minutes. Check if the fan spins up.
- Listen Carefully: Put your ear near the PSU to listen for any faint whirring or clicking sounds.
- Visual Inspection (Power Off!): With the PC completely unplugged, shine a flashlight into the PSU fan area to check for obvious obstructions. Never open the PSU casing itself while it's connected to power, or even shortly after, due to dangerous residual voltage.
2. Afraid of Cleaning Your PSU Fan & Filter
Dust buildup on the fan blades and inside the PSU acts as an insulator, trapping heat and making the fan work harder. A clogged filter restricts airflow, forcing the PSU to draw less air or overheat.
How to Clean:
- Power Down & Unplug: This is crucial. Turn off your PC, unplug it from the wall, and press the power button a few times to discharge any residual power.
- Access the PSU: Depending on your case, you might need to remove a side panel or even unmount the PSU slightly to get good access.
- Use Compressed Air: Use short bursts of compressed air to blow dust off the fan blades and through the vents. Hold the fan blades gently to prevent them from spinning too fast (which can damage the bearings).
- Clean the Filter: If your case has a removable PSU dust filter, slide it out and clean it thoroughly with compressed air or by rinsing it with water (ensure it's completely dry before reinserting).
Aim to clean your PSU filter and fan every 3-6 months, or more frequently if you live in a dusty environment or have pets.
Get Your PSU Cooling Right for a Healthy PC!
Looking to optimize your PC setup, or perhaps in the market for reliable and efficient power supplies and other high-quality computer accessories? Look no further than Huntkey! With a legacy of delivering robust and innovative solutions for PC enthusiasts and professionals alike, Huntkey offers a wide range of products designed to enhance your computing experience.
Visit Huntkey Computer Accessories to find the perfect components to power your passion!